Using SpecFlow 3.0 with Rider

Checkout the Rider plugin for SpecFlow for an easier integration!
A while ago, I wrote about using SpecFlow with JetBrains IDE Rider. Recently, SpecFlow updated their version to 3.0 and it brings some different behaviour with it. After using it for a while, I really like the new flow.
The first change is that I need to install three packages, instead of two. SpecFlow and a unit testing framework (MSTest, NUnit or xUnit) still need to be installed. Additionally, SpecFlow.Tools.MsBuild.Generation needs to be installed as well.
The biggest benefit of the SpecFlow.Tools.MsBuild.Generation nuget is that I don't need to set up a file writer anymore. I do need to update the .csproj file to include some configuration. The whole process is nicely documented on the SpecFlow site, but I'll give the basics here.
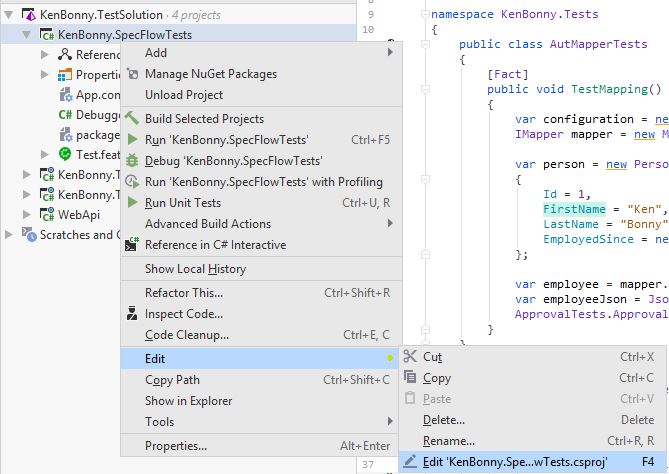
First, right click on the test project and choose Edit > Edit MyProject.csproj option. Then just paste in the next bit of XML:
The old SpecFlow version can add configuration tags in the .csproj file: `<Generator>SpecFlowSingleFileGenerator</Generator>` . They can easily be replaced by doing a search and replace (ctrl+h in rider) and using this regex to find all of them: `\n[ ]+SpecFlowSingleFileGenerator` .
Save the .csproj file and just build the project. The .feature.cs files will be generated next to the .feature files. You can include them in the project, but the build server will update the generated files when it builds the project anyway. So you don't need to include the .feature.cs files in the project anymore if you don't want to.
Happy coding and keep those tests green!
Update: I got some feedback that it isn't intuitive to find the Given/When/Then declarations for the .feature.cs file. All I need to do is run the tests. The method definitions appear in the test output window. If I add a new line, I just rerun the test. The test will be marked incomplete with the new method signature in the test output window. All that's left to do is to copy and paste the signatures into the right file and flesh out the new method. Oh, and don't forget to add Binding and Scope attribute on the class. I've forgotten that more times than I dare to admit.


