As promised, the details on how to switch from WordPress to Hashnode. I wrote about the reasons why I'm switching in a previous blog post. I'm not going to repeat myself, instead I'm going to focus on all the things I had to do to switch.
Preparing the blog content
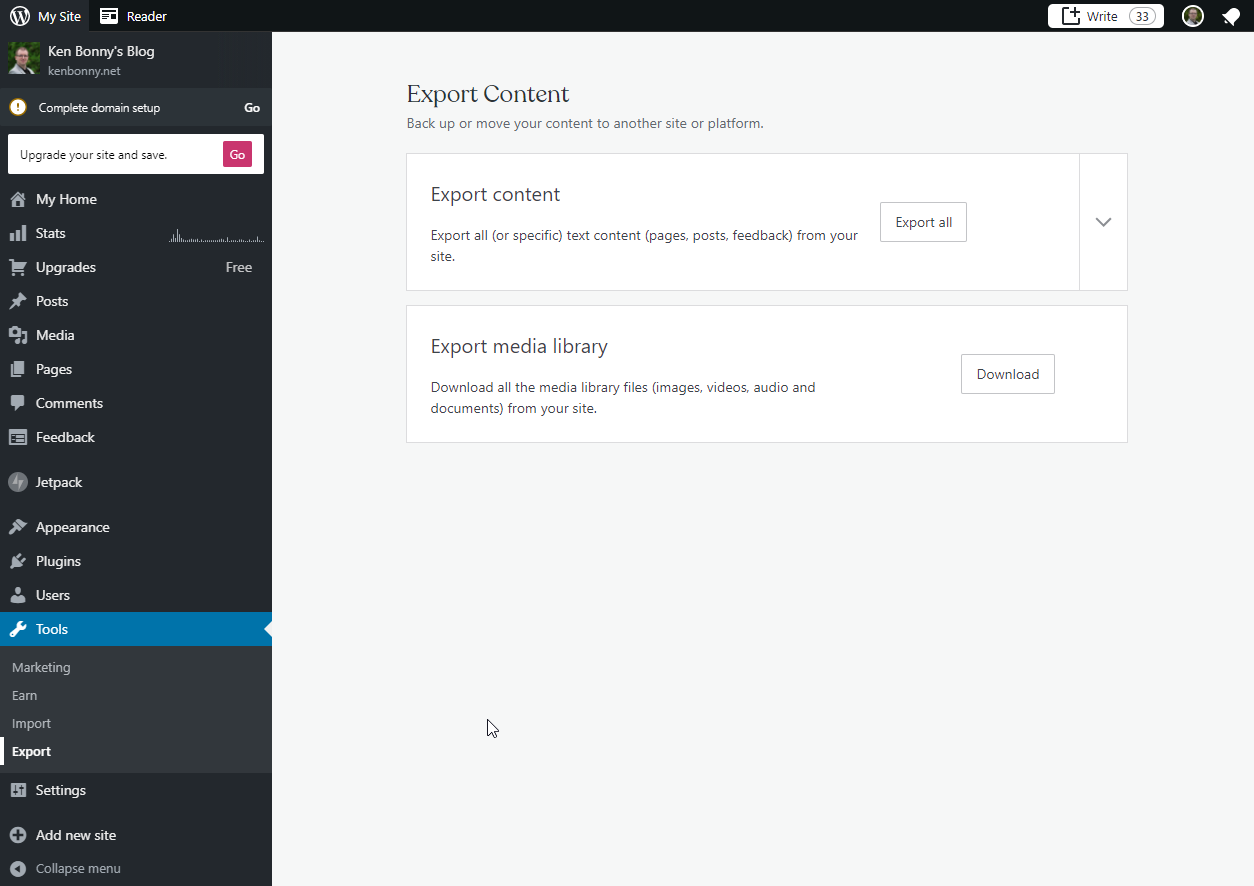
The first step was to get access to all my blog posts as I'm not about to manually copy ~130 posts from WP to HN. The number of things I had to fix was time consuming, if I had to do it all by hand it would have taken forever. Fortunately, there is an export functionality in WordPress to export my posts via Tools > Export. The downside is that this generates one huge XML file and I need markdown files to upload to HN.
After a bit of googling, I stumbled upon a wordpress-export-to-markdown tool. With a bit of experimenting, I found the right adjustments to get the output ready for HN. I just had to replace the frontmatter variable in parser.js to the following code.
frontmatter: {
    title: getPostTitle(post),
    date: getPostDate(post),
    slug: getPostSlug(post),
    image: `https://images.kenbonny.net/${getPostSlug(post)}/cover.jpg`,
    categories: getCategories(post),
    tags: getTags(post)
}
With the following command, I transformed the XML file into separate markdown files that represent each blog post.
> node index.js
Starting wizard...
? Path to WordPress export file? export.xml
? Path to output folder? output
? Create year folders? No
? Create month folders? No
? Create a folder for each post? No
? Prefix post folders/files with date? No
? Save images attached to posts? No
? Save images scraped from post body content? No
? Include custom post types and pages? No
Preparing the images
This took care of the posts and their content, but unfortunately did nothing for the cover images. That's why I ran the transformation again, but this time I told it to download all the blog images.
> node index.js
Starting wizard...
? Path to WordPress export file? export.xml
? Path to output folder? output-with-images
? Create year folders? No
? Create month folders? No
? Create a folder for each post? Yes
? Prefix post folders/files with date? No
? Save images attached to posts? Yes
? Save images scraped from post body content? Yes
? Include custom post types and pages? No
For safety, I copied the content of the output-with-images folder to another folder, so I could experiment with it. The first thing I did was remove all the markdown files as I'm interested in the images at this time. So I ran ls *.md -Recurse -File | rm in powershell to remove the unwanted files. All the images are saved to an images subfolder, I wanted them in the base folder. So I had to find a way to move the images from \\images to \. After a little poking around, I found this stack overflow answer which told me to run ls . -Recurse -Include *.jpg, *.jpeg, *.png | mv -Destination { $_.Directory.Parent.FullName }.
With all the images in the slug folder, it's time to remove the emtpy images folders with the powershell ls images -Directory -Recurse | rm command. I like clean folders. If there is something that I don't need, I like to get rid of it.
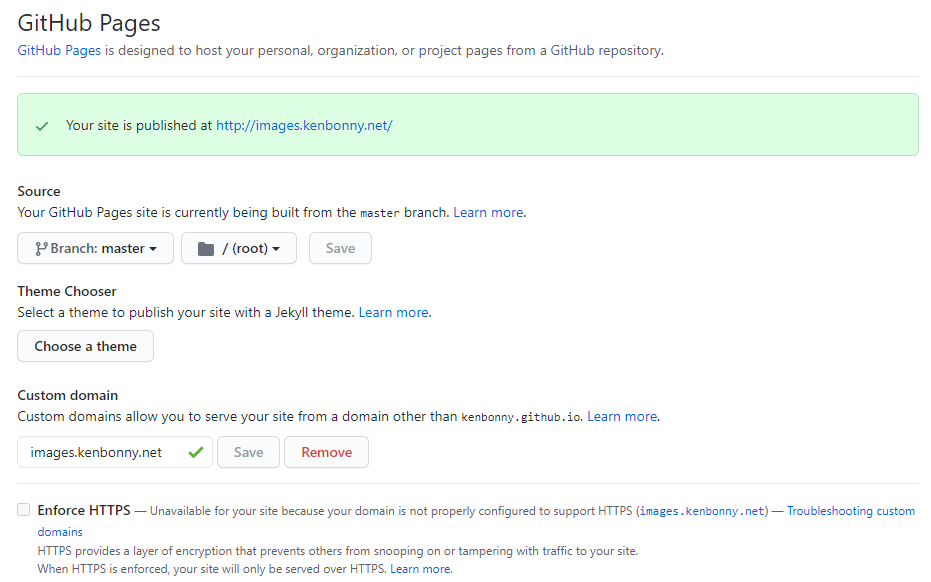
A few git commands later and my images are in a repository on which I enabled GitHub Pages. Since GitHub Pages supports custom domains, I can assign it a subdomain of kenbonny.net: images.kenbonny.net. I configured this subdomain via Cloudflare and called it a day.

I now have my own CDN with an upper limit of 5GB. After 5 years of blogging, the images folder takes up 105MB of disk space. So I think I'll get a decent amount of mileage out of this.
The last hurdle is to make sure there is a cover.jpg file available. I wrote a custom dotnet console app that loops over the folders, checks if there is one image present and renames that to cover.. It printed the folders with multiple images that did not contain one with the name cover. That way I knew which folders to manually check.
Uploading the content
Now that I have my content as markdown files and the cover images are available on my own CDN, it's time to upload the content to HN. I was tempted for a while to write my own upload process using the graphql api so I could add tags on the fly as the import process does not have support for this. There are two drawbacks to this approach:
- No backdate functionality: the frontmatter contains the actual publish date of the post, this backdate cannot be set through the api. This is available through the standard upload process.
- Correlating tags is not easy: in WP I could set any tag I wanted, in HN, there is a curated list of tags (which I've grown to like). There is no 1-to-1 mapping for each tag that I've used over the years. Putting too much effort in this felt like a waste of time.
So I zipped up all the markdown posts (after trying it with some example posts) and uploaded the zip file to HN import tool. After that ran for about an hour all my posts were present in HN. Now all I needed to do was go through each and every post and set the tags right and I was done... right?
Unfortunately, it wasn't that straightforward. Apparently I had forgotten that not every post had a cover image, so there were a number of posts with an empty cover image. There were also a few empty ones that did have a cover image, but the cover image was not in the jpg format that I set as default.
While checking the posts for missing cover images and tags, I noticed something else. During my 5 years of blogging, some WP formats have changed. How code is represented changed quite a bit over the years. In the early posts, I noticed that there were [code language="csharp"][/code] tags throughout my posts. In the later posts, the wp-to-markdown nicely used the ``` format. In some posts, I noticed some additional information such as html comments with WP paragraph specific info. So it was a good thing that I went through each post and fixed the broken parts myself. The automation did a lot out of the box, but keeping track of all the things WP can is an impossible task.
Unfortunately, only after I edited all my posts, I found out that in order to back a post up to my own GitHub repository, I need to save the post. I will not be doing that again to get them into my backup repository, I'll just wait for the tool that can back up the existing posts.
Finishing touch
Now there is one last problem to worry about: legacy URLs. WP uses the format //// while HN only supports /. That would mean that the link https://kenbonny.net/2021/02/01/moving-to-trunk-based-development would not work after the move to HN. This would mean that I had a serious problem as I did not know how many links would break. There are people who send a link to a friend, there are browser autocomplete suggestions, linked articles would not arrive correctly, etc.
While I was checking all the content of the blog, the solution presented itself: Cloudflare transform rules. It's a new feature from Cloudflare that would allow rewriting of urls on the fly. After some experimenting, I found out that regex matches are not allowed for the free plan. I'd love to get a professional Cloudflare plan, but it would be just for this. That is a bit of a steep price for my simple blog.
Fortunately, I can solve the same thing with a Cloudflare Worker. I created a Worker and added the below script. This will strip out the date format and redirct the user to the correct page. If the url does not contain the date format, it does nothing.
addEventListener('fetch', event => {
  event.respondWith(handleRequest(event.request))
})

const movedPermanently = 301;
async function handleRequest(request) {
  const dateFormat = /\/\d{4}(\/\d{1,2}){2}/i
  if (request.url.match(dateFormat)) {
    const urlWithoutDate = request.url.replace(dateFormat, '');
    console.log(`redirect ${request.url} to ${urlWithoutDate}`);
    return Response.redirect(urlWithoutDate, movedPermanently);
  }

  return fetch(request);
}
It is now finally time to switch de domain from WP to HN. All that took was to set the domain in a HN setting and pointing the CNAME DNS record from WP to HN.
Conclusion
Starting from now, my blog is hosted on Hashnode. If I did everything correctly, nobody should really know that this happened except for the visual changes. All links should continue to work and all content should be converted into the right format. If anybody finds any issues, let me know and I'll look into it.