A Simple SpecFlow 3 setup in Rider

Checkout the Rider plugin for SpecFlow for an easier integration!
Recently, I've gotten some mails on how to use SpecFlow 3 with Jetbrains Rider 2019.3.1. So I thought I'd update my how-to posts with this addition. If you are just here for the code, you can find it on my GitHub account.
I'm keeping this specifically simple and small. As soon as the project does what it needs to, I'll stop, because my previous articles on this explain the rest (which still works) in more detail.
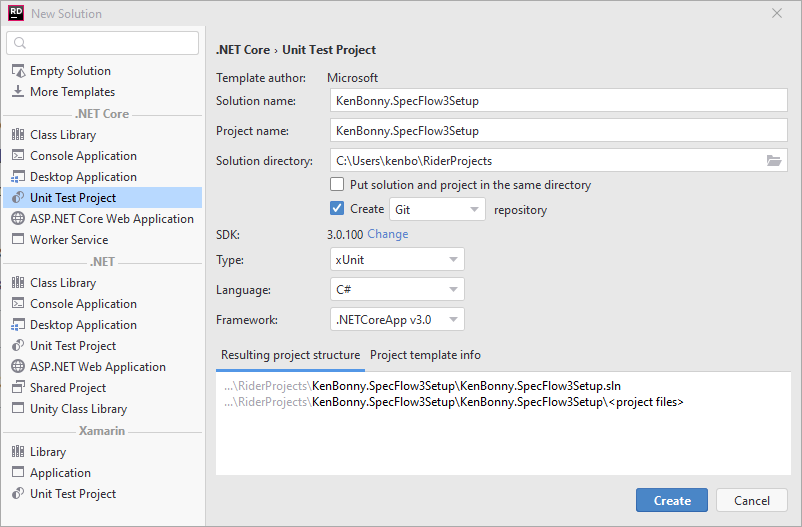
I'm just creating a new solution from Rider and adding a Unit Test Project with the xUnit framework. If you're unaware, I'm a big fan of the xUnit framework. Then I added 3 Nuget packages:
- SpecFlow
- SpecFlow.Tools.MsBuild.Generation
- SpecFlow.xUnit
At the time of writing this article, all these packages have version 3.1.74.
When I want to install the SpecFlow.xUnit package, Nuget complains that xUnit is not the latest version and I have to update from 2.4.0 to 2.4.1. I took the opportunity to use Riders awesome Upgrade All Packages In Solution. Quick and easy.
Now that everything is installed, I just insert a File and name it SomeTest.feature. I type away and create a simple SpecFlow file. I could now build and run the test, but out of habbit, I create a SomeTest.steps.cs file and put in the basic Binding and Scope attributes above the class.
Then I run the tests and check the output.
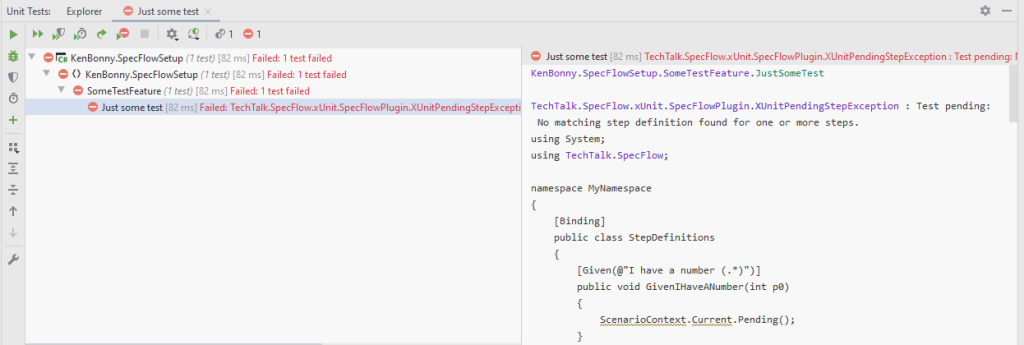
As you can see on the right part of the output pane, it still works as in my earlier article and I can just copy out the relevant parts for my test setup. After I flesh out the test a bit, I run it again and get a green check.
I did exclude the generated *.feature.cs as it contains an unknown element, but does compile. The error does show the annoying red line below the file hierarchy it influences. They are not needed in the project (or the git repo, I excluded them via the .gitignore) to make the tests run. They are being included during the build step anyway.
SpecFlow 3 works very nicely with DotNet Core 3.x and the Rider IDE. It's a great time to be a (DotNet) coder!


