


In May of this year, I wrote an article on how to get JetBrains Rider to generate SpecFlow files. The biggest problem I still had back then was that I couldn't generate the step definitions. I finally found a workaround so I don't need to use Visual Studio anymore.
After creating a test project with the full dotnet framework, I add the SpecFlow and SpecFlow.xUnit packages. I insert a .feature file and write a test. The save generates the .feature.cs file (see my previous article how to set that up).
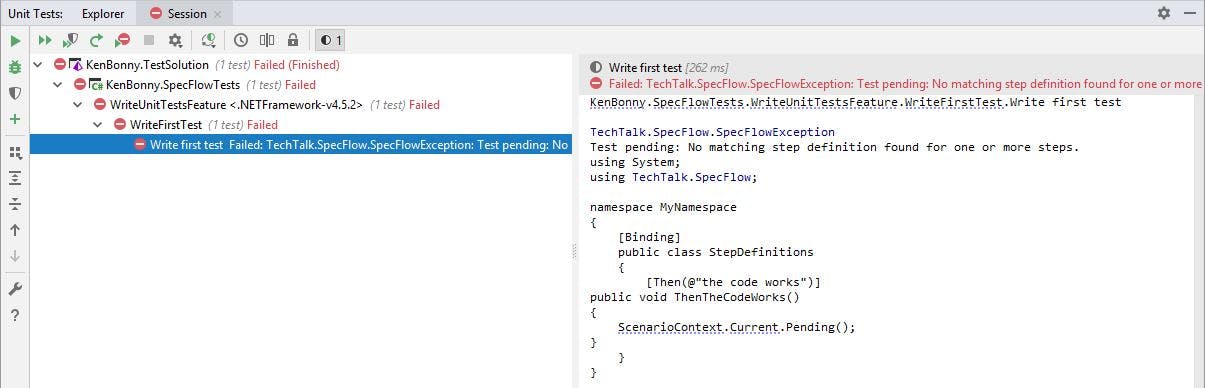
Now that I can execute the test, I just run it.

In the test output window is the basic setup for the current steps. Just copy and paste the steps into a new file and enjoy the steps generation. When I write a new Given, When or Then step, I just rerun the test and check the output for the method signature.
Have fun generating feature steps in Rider.
While setting up a small test environment, I found out SpecFlow isn't dotnet core compliant yet, but they're hard at work to make that happen. Keep up the good work guys!
While installing the SpecFlow packages, I found out the default dotnet core packages location changed from the solution folder to the C:\Users\[UserName]\.nuget\packages folder.
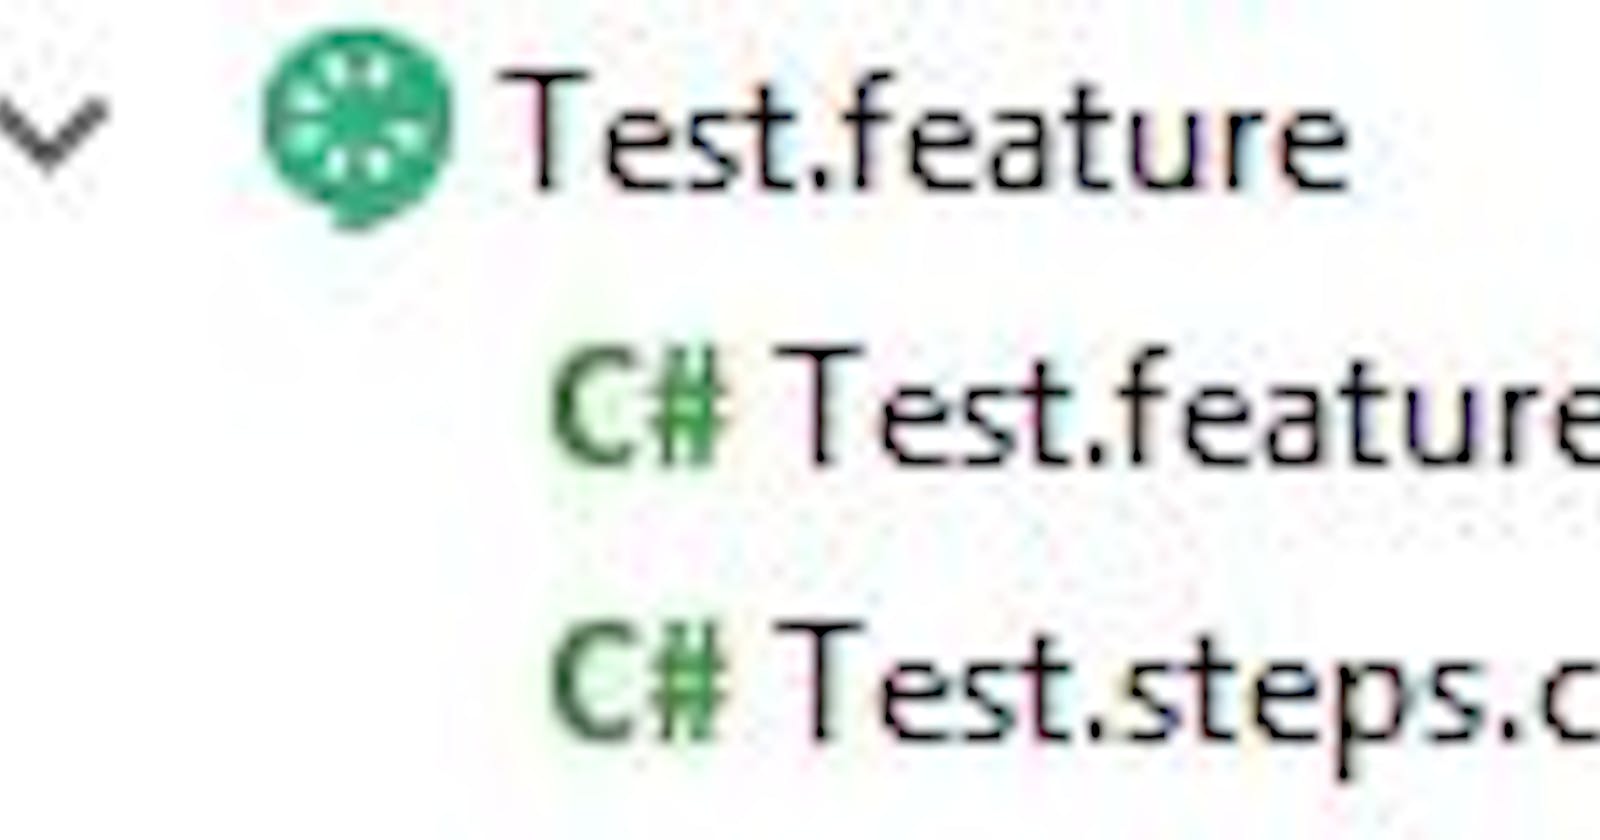
In Rider, there is a nice feature to nest files. In the Solution window, there is a button to open the File Nesting window. Just add a Parent file suffix with ".feature" and a Child file suffix of ".feature.cs; .steps.cs".
Now feature files will nicely be nested.


Hopefully these tips and tricks will prove useful to some Rider users out there.