


A week or two ago, I read a blog post from Scott Helme about Easy, cheap and secure backup with Google Cloud Platform. I agree wholehartedly with Scott about the importance of backing up your stuff, as I only recently (the past year) started backing up my stuff. I have fortunatly never experienced data loss, I've never had a HDD fail on me and I've never had my house burn down or flood. So instead of going full out, off-site, redundant backups like Scott describes, I'll be talking about the local backup setup I have. Don't worry, it's easier than you think.
Backing up my stuff
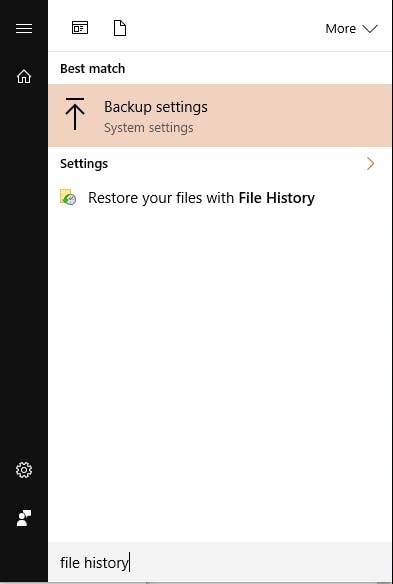
My backup strategy is actually very simple: I use File History. This is a functionality that has been available since Windows 8. To set it up, open the start menu, search for "File History" and click on "Backup Settings". Turn "Automatically back up my files" on and select "More options".
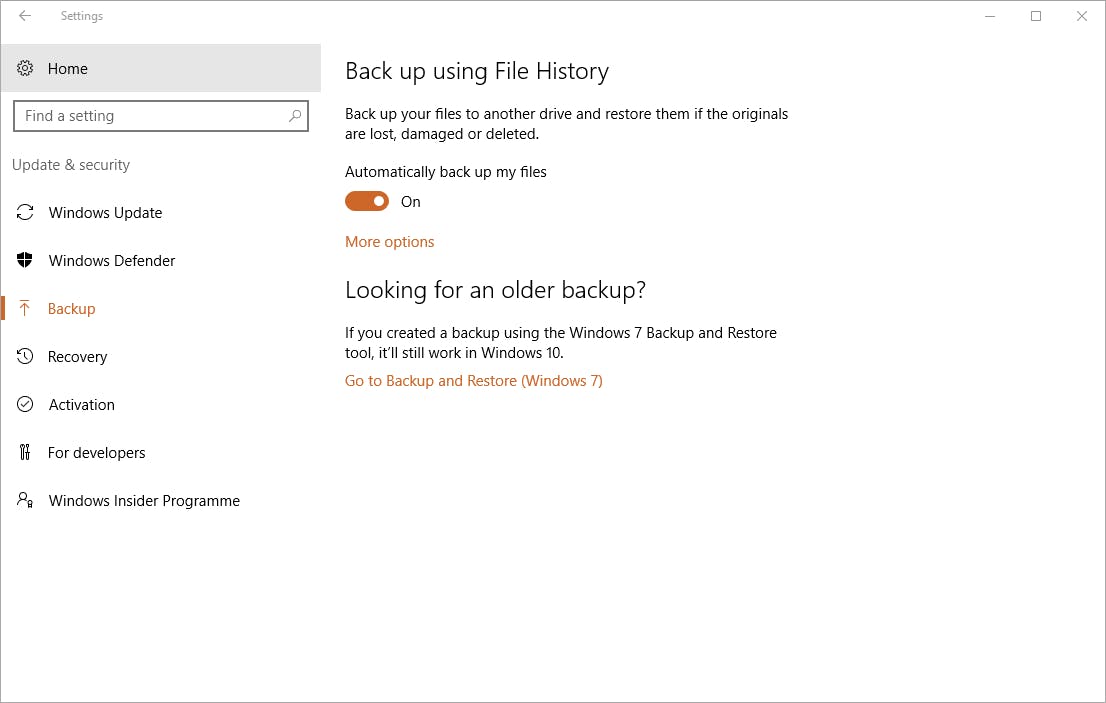
I let File History backup my files every hour and keep them for 3 months. That covers most of my horror scenarios. Below those settings, you can choose which folders to back up and which ones to ignore. I choose to ignore OneDrive and DropBox folders because those services take backups of that data, so that would be a waste of space. Besides that, I like to back up all my Library folders and a few personal ones. Pick the ones that are important for you and don't forget to double check the folder with your legal documents and family pictures.
Scroll down and set up a location. You can always update it later through "See advanced settings". I recommend buying a NAS or other storage that is not directly tied to your PC. Should something happen to the PC, then you still have the seperate disk. I'm very happy with my Synology DS413j which does a number of other tasks besides storage.
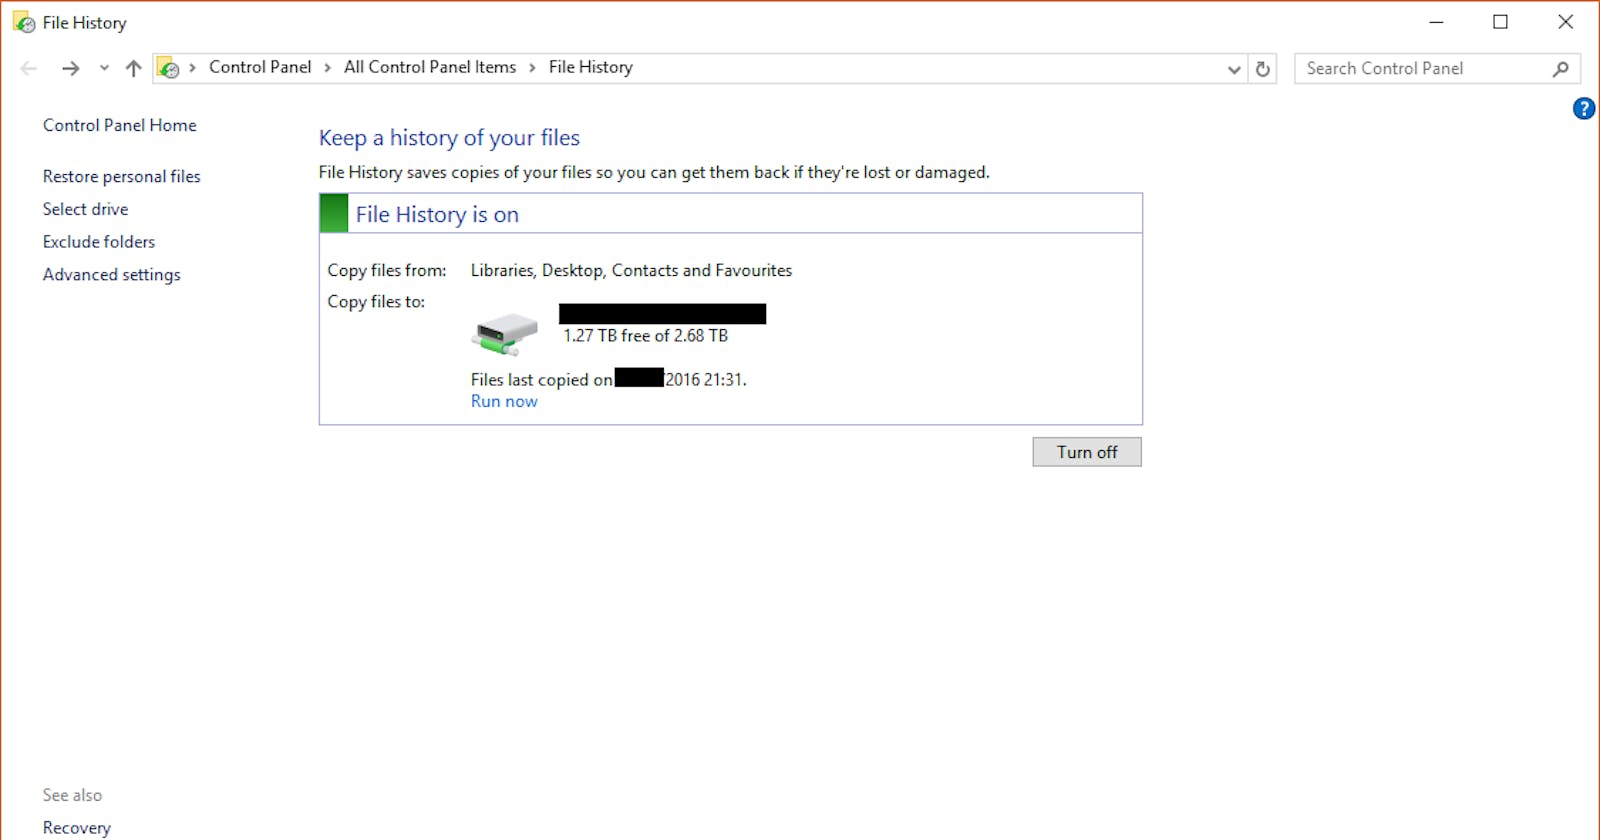
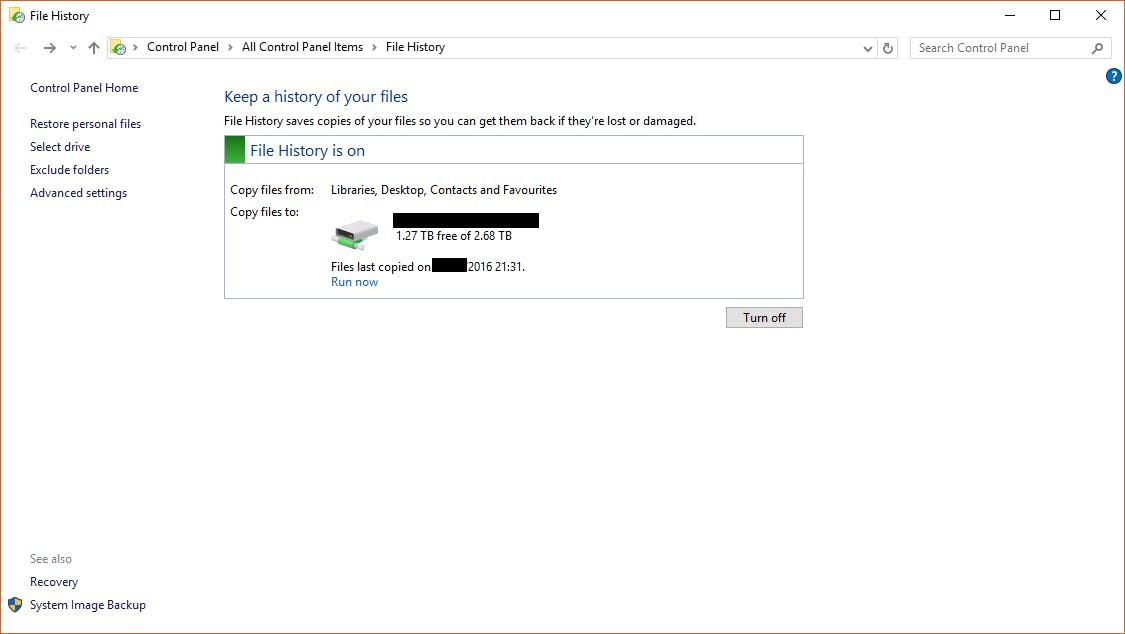
As I already set up File History, I'll describe the advanced settings, which closely match what you would see when you start this up the first time. So click on "See advanced settings". My screen already displays a screen that shows my current backup location and whether it is available. On the left side, there are a number of options. I will talk more about "Restore personal files" later. We have set "Exclude folder" and "Advanced settings" in the previous screen so I won't be touching on them.
Select "Select drive" option. This will take you to a screen where you can select the available drives. Your tray will probably be empty, so select "Add network drive" and locate the folder you want to use as backup location.
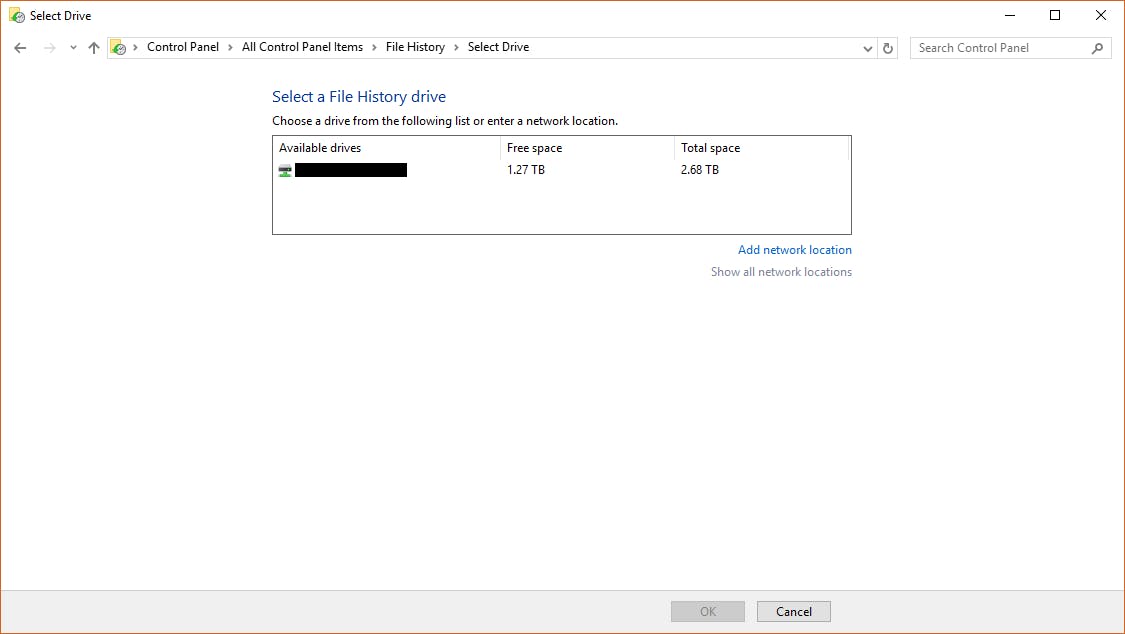
If you have previously set up a File History location, this can be automatically detected (but not always) and then you can use that location to continue taking backups to. For example after you reinstalled your PC. Click on "OK" and you are done.
Drive not availabe
Let the backing up of your files start. Stop worrying about losing files. But what if your network location is unavailable?
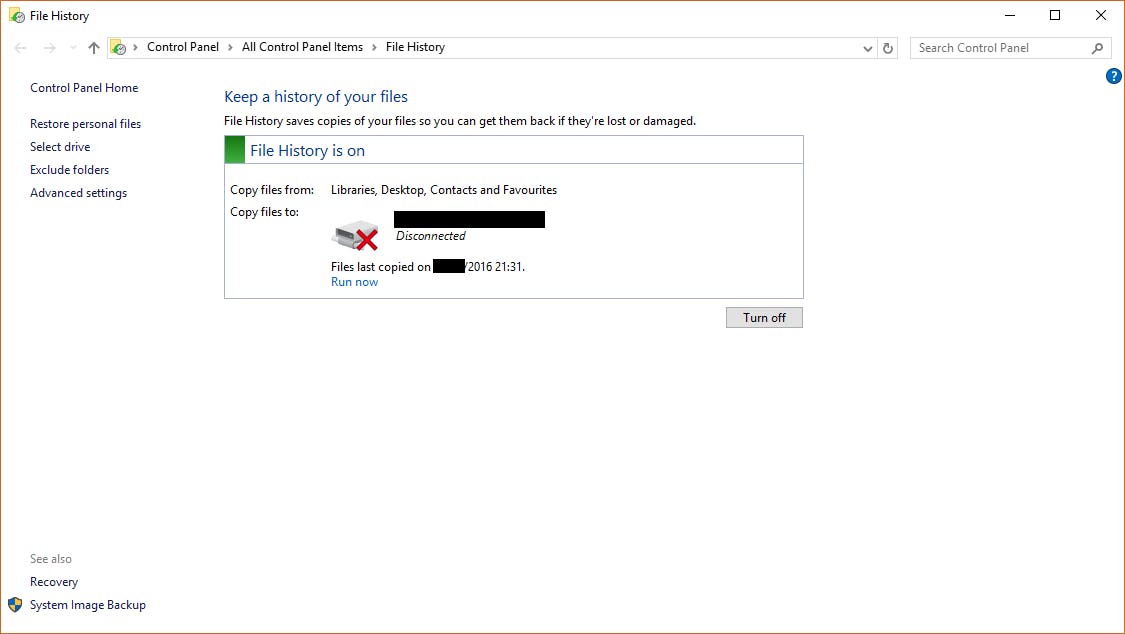
It's very simple, Windows will back your stuff up to a random location on the hard drive that is not in use. When the backup location becomes available, it'll sync the local backups to the remote location. No worries for you.
Restoring backups
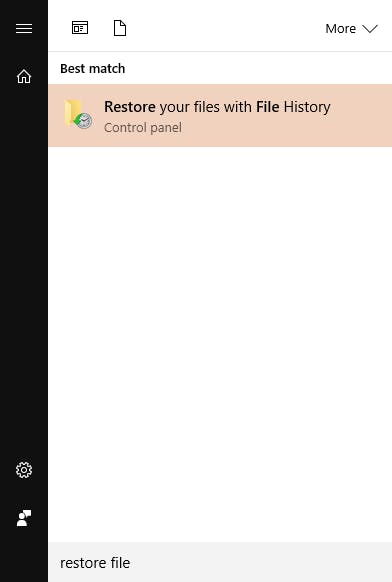
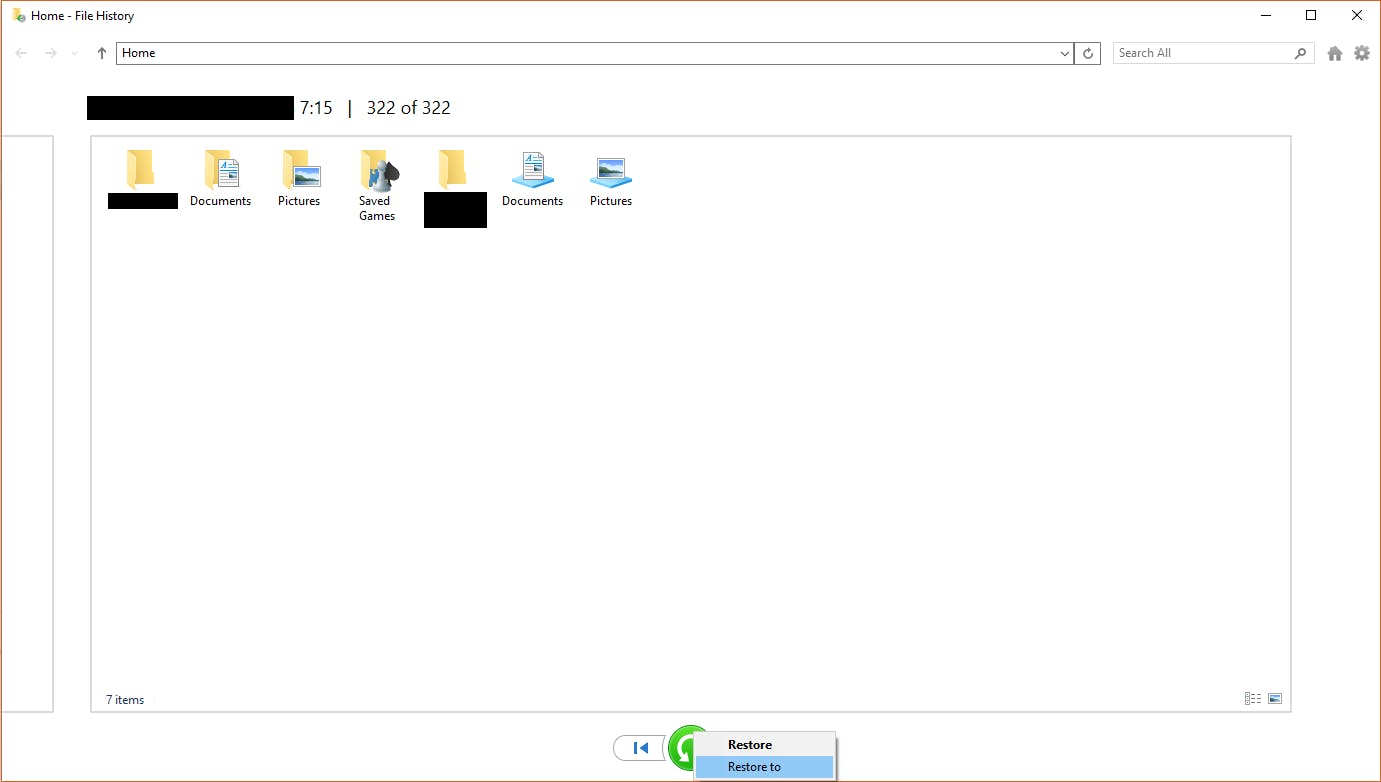
When the fatefull day finally arrives and you need to restore one or more files, it's very easy. Open the start menu and look for "restore file" and click on "Restore your files with File History" or go back to "Control Panel > All Control Panel Items > File History" like we did before and click on the link "Restore personal files". Both paths will bring you to the below screen.
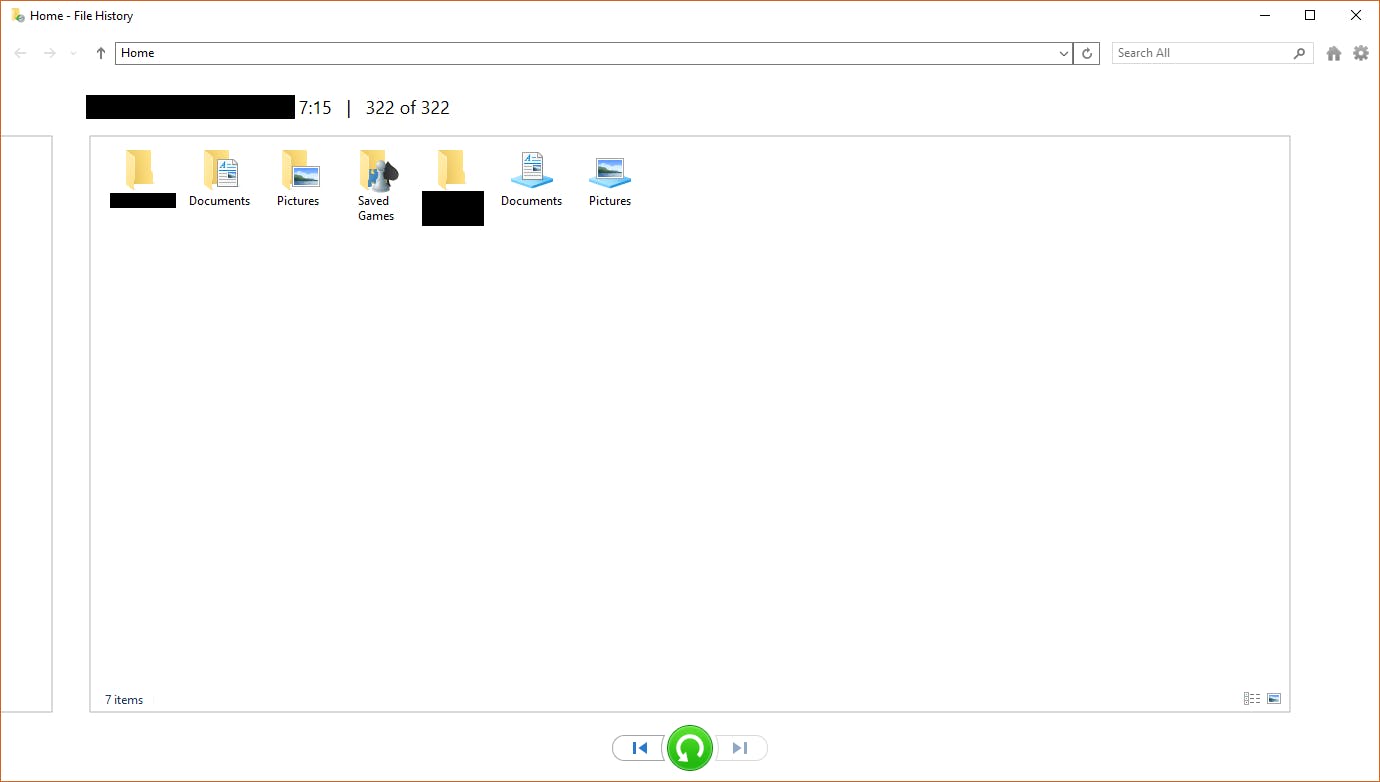
Select one or more folders or go into folders, select the files you want to restore and click the big green button at the bottom. Done.
There is one last thing that I spent some time looking for, because it's not intuitive in my opinion. How to restore to a different location than before. This is convenient when you have a new PC and want to restore some files to another location. Select the folders and files as before, but now right click on the big green button and select the "Restore to" option. A window will open where you can choose the location to restore the selected files.
If you want a specific version of a file, just click on the left or right sides of the screen to move between the different back up versions. Not the most ideal way to select the version you want to restore, but the File History is easy to set up, use and is bundled with Windows. For me, that offsets this little annoyance.